With newer technology being developed every day, the power of a camera and what it means to be a photographer is constantly evolving. Since the 1800s we’ve come a long way and with the recent developments of DSLR systems, compositions we’ve never thought possible are now a reality. To many people photography is simply finding a composition you like, pointing the camera at it, and pressing a button, but the possibilities of a camera when you experiment with manual settings are greatly expanded. One of the more unique and time consuming forms of photography includes long exposure photography.
Long exposure photography simply consists of taking an image with a longer than usual shutter speed (also known as an “exposure” hence the name “long exposure”). Typical images taken on an everyday basis are taken with very fast shutter speeds usually within a fraction of a second. That “clicking” sound you hear when you take a photo is the shutter opening and closing very briefly to let light through into the sensor. So essentially the faster the shutter speed, the less light gets lets let in and the slower the shutter speed, the more light gets let in.
Because of this unique ability to manually alter the shutter speed, cameras are able to capture compositions even in situations of extremely low-light using long-exposure techniques. So in this case, when it comes to shooting the night sky and the milky way, mastering the technique of long exposure photography is a must. And although it requires much more patience then other forms of photography it’s actually very easy and anyone can do it. Follow these tips and tricks and you’ll be on your way to capturing your very own beautiful nightscapes.
Camera Gear & Equipment
So of course in order to shoot the milky way the first step is to get your hands on some decent gear. Yes, generally speaking the nicer the gear, the better it will perform, but you don’t actually need to spend too much money to get these night sky compositions.
After finding a solid tripod and a memory card, the next necessary piece of equipment is your camera body. To be honest once you know how to use them, almost any DSLR camera on the market is capable of night sky compositions with the right lens and setting adjustments. The one crucial requirement though is that your camera is capable of manual settings so you can self adjust the aperture, shutter speed, and ISOs as necessary. Full frame DSLRs are more pricey and will drastically outperform cheaper crop sensor cameras, but if you’re tight for cash or just starting out, crop sensor cameras can still capture great nightscapes.
Once you’ve got your hands on a decent body the next step is to find some good glass. This is arguably more crucial then the body. The type of lens you get determines the aperture range you will be limited to. Because the aim here is to shoot in situations with very little light, you want to aim for a lens that is capable of letting more light into it.
Basically when you take a photo, light passes through a hole within your lens to reach your sensor. This is where aperture comes into play. While shutter speed determines how long the hole is open, aperture determines the size of the hole. So just like a longer shutter speed means more light is getting let into the camera, similarly a wider aperture means more light is getting let in as well.
That being said, every DSLR lens out there has an f-number which determines it’s aperture capabilities. What we are looking for are lenses that have a wider aperture. The number specs can be confusing at first but basically the bigger the number, the more narrow the aperture is, so keep your eyes out for the smaller f-numbers. I would recommend a lens with an aperture of f/2.8 or wider but in the past I have gotten away with narrower apertures such as f/4.
In addition to aperture, the best type of lens for astrophotography is a wide angle lens which basically is any lens less then 35mm. You want a wide angle because typically you want to capture both the foreground and a good amount of the sky which requires more of an angle to see both in one shot. It is also easier to get crisp, in focus shots with a wide angle. I’d say the prime range would be from 18mm to 24mm but you can shoot however you prefer. The numbers and specs of the lens matters much more then the brand. You can essentially use any type of lens as long as it has the right specs to shoot the milky way. However I will say if you are looking for decent glass at an extremely generous price I’d recommend the Rokinon wide angles.
Location, Location, Location
One thing that seperates night sky photography from most of the other forms of photography is that it relies heavily on environmental factors. If you’re in the heart of a city at night or if you’re shooting on an extremely foggy day you’re going to find yourself having a really hard time capturing stars. This is where patience comes in. Patience and planning are crucial for this style of photography.
First off you want to make sure you find a location that doesn’t have any light near it. Even if you manage to find a location where there aren’t any lights directly nearby you can still run into problems if you are even somewhat near to cities, towns, or neighborhoods because light pollution can linger for miles depending on how strong it is. This may require some time on google maps and actually one of my favorite tools to use is a dark sky map such as darksitefinder.com.
The next thing you need to consider is the weather and sky conditions. Make sure it’s going to be relatively clear where you are going, you don’t want any thick clouds or storms rolling in and ruining your shot. Wind and temperature are also something to keep in mind, you want to make sure you’re dressed accordingly and sometimes strong winds can move your camera and these types of shots heavily rely on a very still, unmoving foundation.
Also worth paying attention to are the celestial bodies that can impact your shot. Once you’ve concluded that the weather is going to be clear, you want to keep an eye on the moon. Some days the moon is quite subtle and won’t really affect your shot, other days the moon will be full and bright and out all night and won’t allow you to see any stars. And don’t get me wrong the moon isn’t always a bad guy, sometimes if you time it right or experiment enough you can get the moon right in the middle where it isn’t bright enough to ruin the stars but there is just enough subtle light to light up your landscape which is more then ideal.
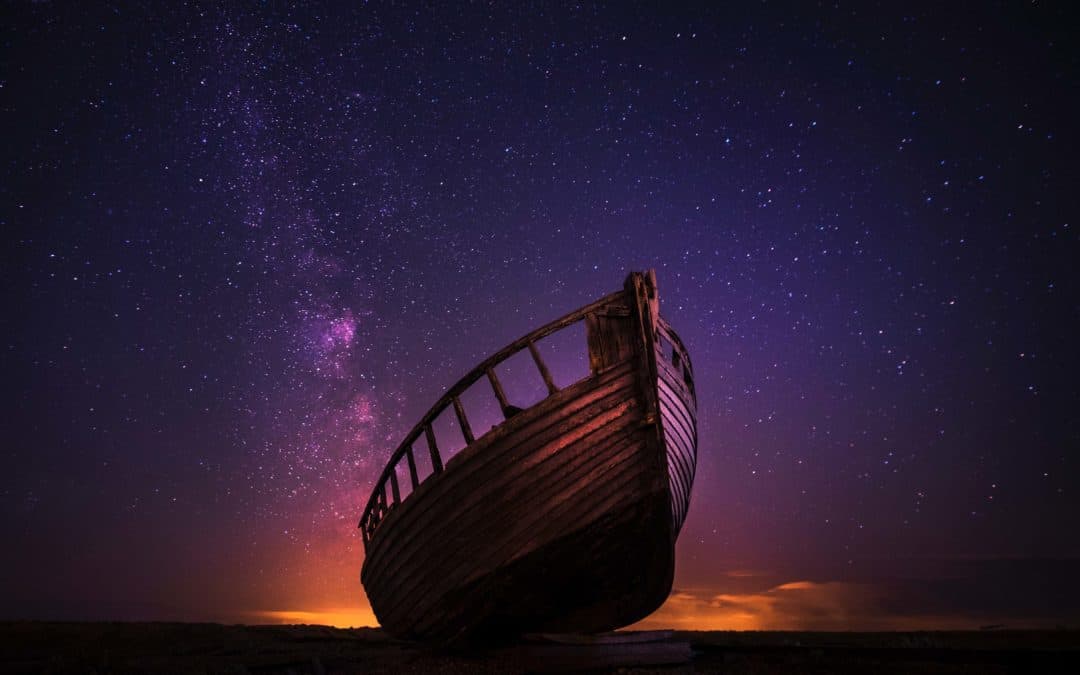
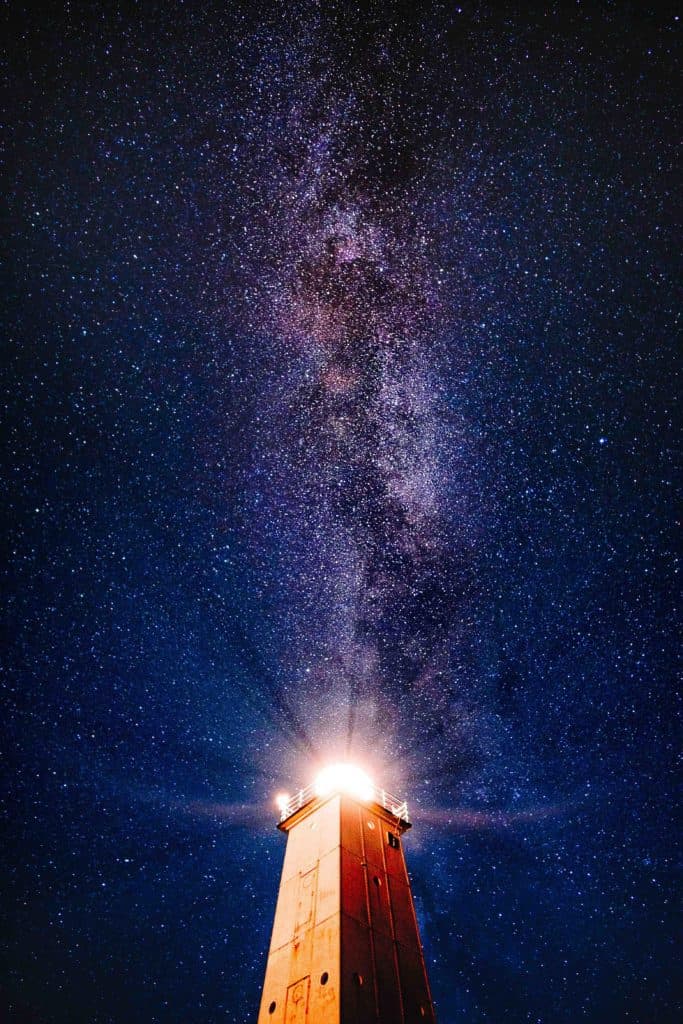
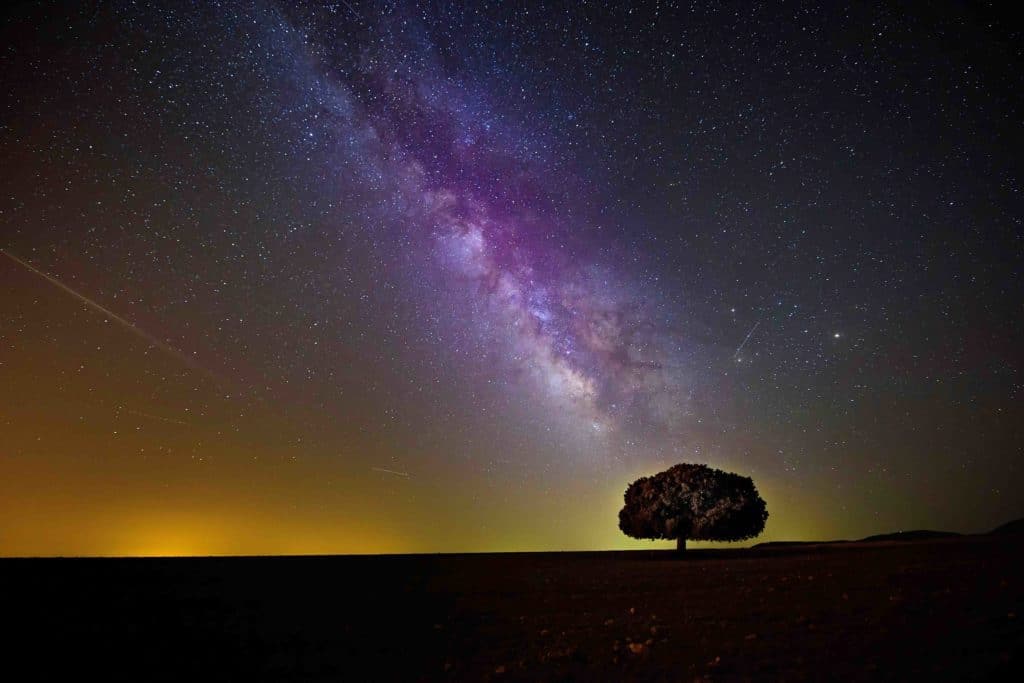
Another thing to keep in mind are planets, certain star formations, and the milky way itself. Adding in certain elements to your composition can make them very visually appealing, so if your aim is to shoot the milky way then you better make sure it is going to be visible that night and it is going to be in the direction you want to shoot. In North America the core of the milky way is the most visible in the summer and is impossible to see towards the winter months. There are several extremely helpful apps and sites out there you can use to predict where things like the moon, the milky way, and planets are going to be. One of my go-to apps for my phone is the free Star Walk 2 app, it allows you to see exactly where everything is going to be at any point in time.
Taking The Photo
You’ve done all the research and preparation, the weather conditions look promising, you’ve got your gear ready to go, and you’re ready to set everything up and start shooting. The hardest part is over and now the fun begins.
So once you’ve found a nice location away from light and clouds, you really want to examine your options and find a composition that you think will be visually appealing. Capturing the night sky from any angle is always fun but you really want to get into the mindset of finding something nice to put in the foreground.
Take your time and look around you. Look for things to fill the space so that your photo isn’t just land and sky. Look for interesting structures, lakes, trees or anything you can put in your composition to give it some style. Consider things like balance, the rule of thirds, and depth when choosing a composition. Don’t be afraid to take test photos so you know what it will look like through the camera. It’s always better to have too many photos then not enough.
After you’ve found a composition you like it’s time to lock your camera into your tripod. Make sure all the joints are securely fastened and your camera is screwed in extra tight to ensure it will not move at all for the duration of your exposure. Depending on the conditions you want to mess with the settings until you’ve found something that looks the best.
You’ll most likely want to keep your aperture as wide as your lens will allow (smallest f-number) and then you want to experiment with different shutter speeds and ISOs until you’ve found the right balance. Typically you’ll want a shutter speed of at least 10 seconds and although you can experiment with longer shutter speeds if you want, the typical night exposure usually doesn’t exceed 25 or 30 seconds.
Another setting in your camera you’ll want to experiment with are the ISOs. ISOs will digitally boost your cameras ability to see in low-light situations. However ISOs are bitter sweet. The higher you set your camera’s ISO then the more it will be able to see but once you start reaching the higher ISO levels your images will become more noisy and the sharpness and quality of your images will slowly become affected.
If you can’t see anything, then you have no choice but to boost your ISOs a little but ideally you want your ISO number to be as low as possible to keep as much quality as you can. This is where a nicer camera body comes into play. Generally speaking the higher end more expensive camera bodies can handle higher ISOs better than the lower end systems.
Essentially everything you really need to experiment with is, aperture, shutter speed, and ISOs. You want to also make sure both your camera and lens are both in manual focus and that you take your time to really make sure you’re getting everything as crisp as possible. Usually when trying to get the night sky in focus you’ll want to shift the focus on your lens either to all the way over to infinity or just before infinity.
That pretty much sums it all up, it definitely take a little practice and patience but the result is more than worth it. You can also do wonders in post processing with programs like adobe lightroom to touch up your photos and make them even more visually appealing so don’t freak out completely if your photos don’t come out perfectly. You can do all the research you want but at the end of the day it is the in the field experience that will teach you the most. The most important thing in photography is to have fun and not get frustrated. That is the beauty of shooting nature, the environment is always calling the shots. If you found this article on shooting the milky-way interesting, be sure to check out our blog on time lapse photography.